

- Part 1: Containerize your Application Environment
- Part 2: Creating a Developer Image (this post)
- Part 3: Hot Module Reloading and Code Updates in Containers
- Part 4: Composing Multi-container Networks
- Part 5: Sharing Images with Your Team Using Docker Hub
- Bonus: Debug Docker Containers with WebStorm
In the first part of the series, we got started by creating a base Docker image of our application and running an instance of that image (known as a container). We also got to witness the Power of Grayskull…I mean, Docker! We did all the typical setup and running of an application, not from our local host machine, but from within a container. Continuing this Docker for Developers series, we’ll look at setting up an application development environment image that can be editable.
Docker for Developers: Getting Started
Our goal in this part of the tutorial is generating an image that will represent the development version of our application and set up the necessary components of a running container so that we can make changes to the file system and have them reflected in the container.
Step 1: Creating a Development Image
Lets create a new Docker image file in the root of our application that will be the instructions for our derived image:
- Add a file named “dev.dockerfile” to the project rootPaste in the following:
FROM express-prod-i

ENV NODE_ENV=development

CMD ["./initialize.sh"]
What did we do?
We created a new docker image file that
- will have a base image FROM our production image “express-prod-i”
- and create the container local ENV variable NODE_ENV with the value of “development”.
- Finally, specified that we want to run a bash shell script named “initialize.sh” from the WORKDIR.
Step 2: Create our Initialization Bash Shell Script
Instead of having our application initialize when the image is created, we’ll move that over to occur in our container. Therefore, those application priming steps such as “npm install” will occur anytime the container is started:
- Create a file named “initialize.sh” in the project root
- Paste the following inside the “initialize.sh”
#! /bin/sh

npm install

node bin/www
- From a terminal/prompt navigate to the project root and run the following command to make the bash shell script executable:
chmod +x initialize.sh
What did we do?
If you recall, we specified in the base express-prod-i image, to run the “npm install” command, which will have the installed NPM packages part of the container. However here we:
- created a file that will contain the commands we want to run every time the container generated from this image is started.
- Set the permissions so that the file can be executed from within the container and the initialization steps such as “npm install” are ran when the container starts up.
Step 3: Create Application Development Image
Now, that we have a new Docker image file, we are ready to create an image.
Step 3a: Build Development Image
Just as we did in the last tutorial lets create a new image:
- From a terminal/prompt navigate to the root of our project directory.
- From your terminal/prompt at the root of the project directory execute the following command and don’t forget the [space] and “.” at the end:
docker build -t express-dev-i -f dev.dockerfile .
What did we do?
- We used the Docker build command and created a new image.
- Those that noticed, we used a new flag (-f) which stands for file in order to specify WHAT Docker file we want it to use. Remember the default is Dockerfile.
- As before specified the image name with the tag (-t) flag and gave it a name of “express-dev-i”.
Step 3b: Listing Images
- We can see are previous and new images by running:
docker images


Step 4: Generating and Running a Container with Volumes
We now have an image that will represent our development version of our application, which uses our production as a base. We now want to run that container, but with something new: Volumes.
All along, you might have been wondering how we are going to edit source code and have it reflected in the running container if the sources code resides in the container, right? That is one of the primary goals we set out to accomplish, is it not?
I mentioned before that images are a stack of differentiating read-only layered file systems. Where each layer adds to or replaces the layer below it. I have also mentioned that the container is a running instance of an image. But it’s more than that. A container provides a read-write layer to the underlying read-only file system of the image.
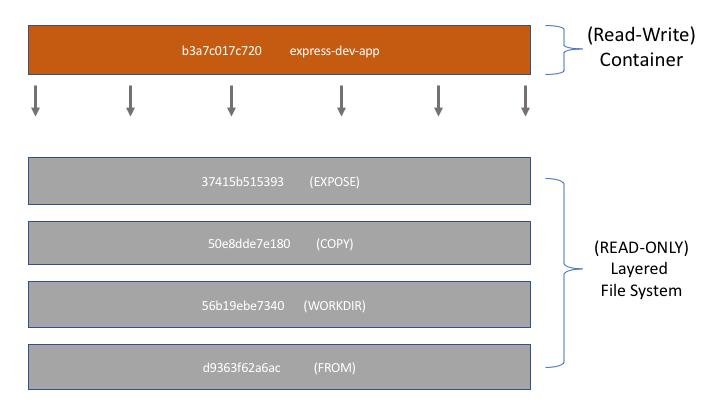
In order to combine these read and read-write layers together, Docker uses a Union File System. But state changes through the container are not reflected in the image. Any file changes reside strictly in the container. This poses a problem. When a container is brought offline, any changes will not be preserved in the underlying image that the container was instantiated from.
Therefore, to persist changes made through the container (along with other benefits) Docker developed Volumes. In short, volumes are directories or files that exists outside this Union File System and generally reside on the host (read: your computer) file system.
Step 4a: Create Dev Container with Volume
Now that we have an image representing the application development version, we are ready to create a container with a mounted volume on our host machine that points to the application’s source code local directory:
- From a terminal/prompt navigate to the express app root directory
docker run --name express-dev-app -p 7000:3000 -v $(pwd):/var/app express-dev-i
NOTE: The value given to the volume -v flag is broken up as host directory separated by ( : ) and followed by the container WORKDIR working directory. This is only relevant to our setup, but the specified container directory doesn’t necessarily have to be the WORKDIR directory.
What did we do?
- Using the Docker RUN command we generated and started a container (instance of an image)
- and gave a name of “express-dev-app” to our container using the –name flag
- along with mapping a local port on our host machine of 7000 to the internal container port that we exposed of 3000 using the -p flag (goes along with the Dockerfile EXPOSE command)
- Using the volume -v flag we mounted a volume on the host machine, in which the $(pwd) represents the “current working directory” on the host machine to a directory in the container “/var/app” (which was specified as the WORKDIR in the Dockerfile).
- Finally, specifying the image “express-dev-i” that we want to generate and run our instance of as a container
Step 4b: Validate Container Is Running
If everything went as planned, you should have seen in your terminal/prompt the results of the npm install being run with the listing of node modules being installed. I specifically left out the detached -d flag so that this could be witnessed.
- We can verify that there haven’t been any issues with the running container to cause it to stop by running the “list running containers” command:
docker ps
If none are listed, you can add the ALL -a flag to the above command to show all containers and see if there is a listed exit error for the “express-dev-app” container.
Step 4c: Inspecting the Container for Mount Information
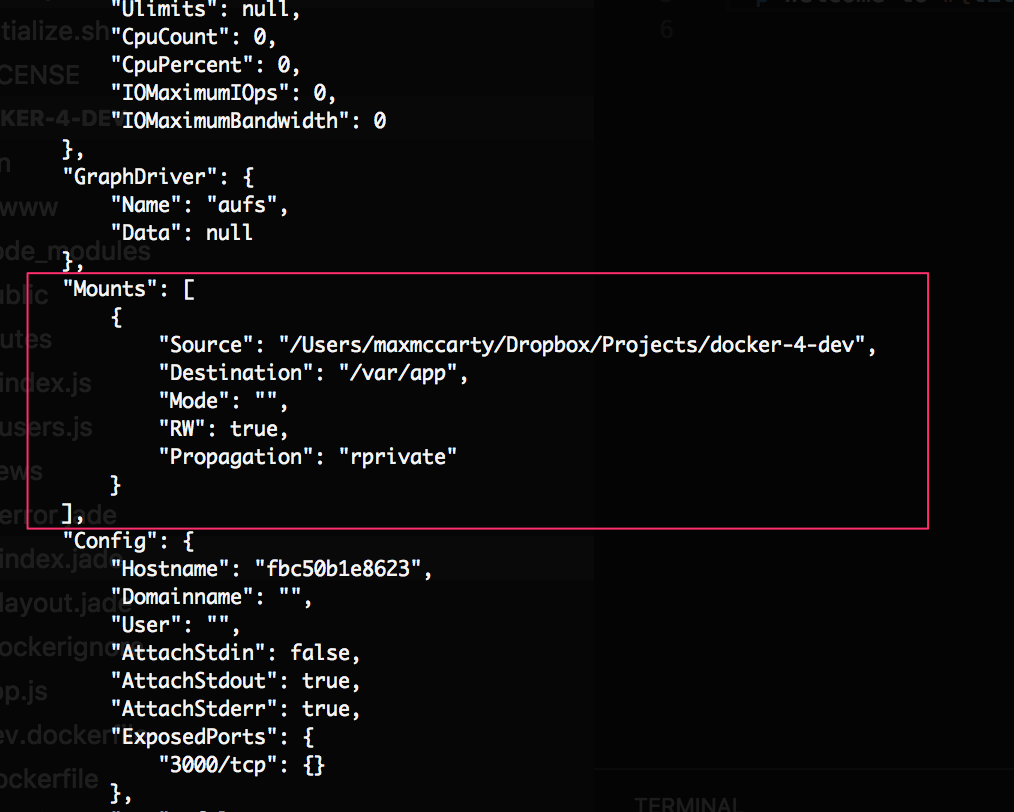
- Before we move on, we can view information about the mounted volume with this new container by using the following INSPECT command, which will show us a ton of container information in addition:
docker inspect express-dev-app
What did we do?
- We used the Docker INSPECT command to view a JSON output of information about our container
- that consists of a “Mounts” section that lists the
- source, which points to the project root directory that we specified on the local host, and the
- destination, which points to the WORKDIR directory in the container
Step 5: Editing Source Code Locally
This is the moment you have been waiting for. We’ll jump right in and see how we can make source code changes locally and see them reflected in the container.
Step 5a: Verify Running Express App
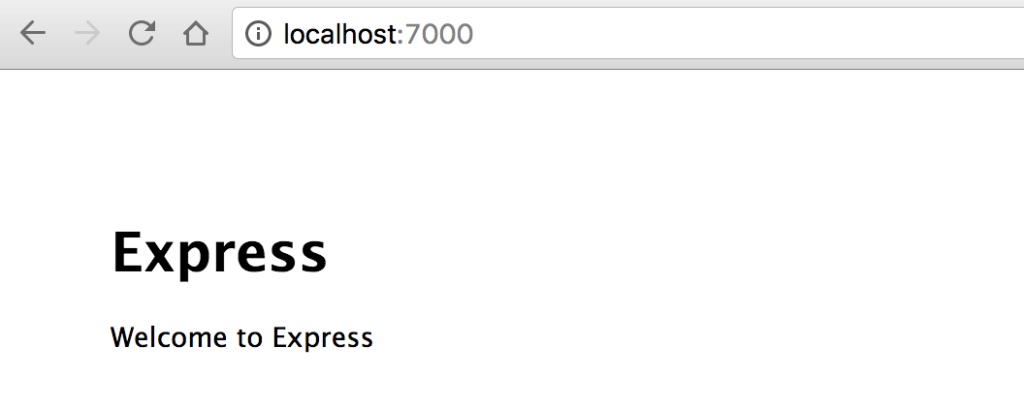
- Navigate in your browser to http://localhost:7000

Step 5b: Edit Source Code
- In the root directory, navigate to the /views directory and open the index.jade file
- Locate the line
p Welcome to #{title} - Edit to
p Welcome to #{title} running in a container! - Back in your browser, refresh the URL (or navigate to) http://localhost:7000

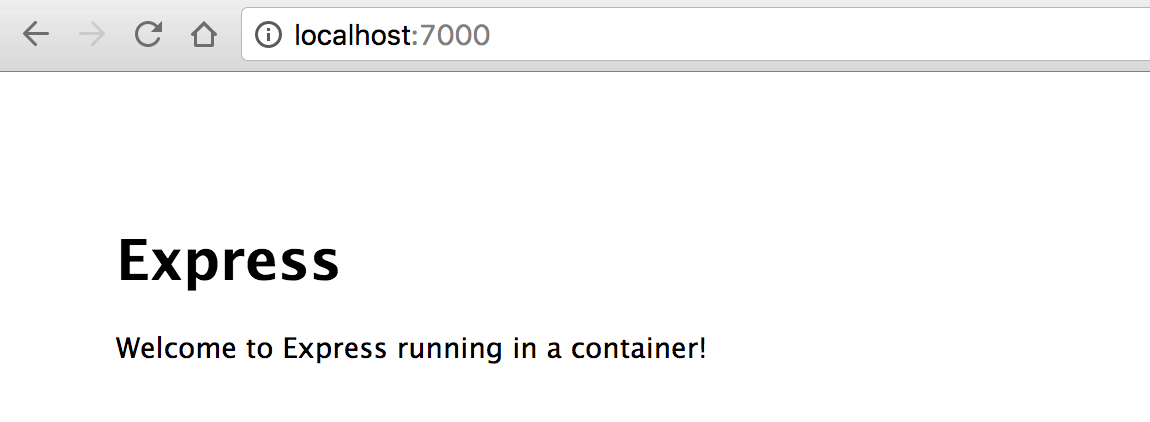
What did we do?
We didn’t have to rebuild or even restart the container to see our simple, yet powerful changes to the front-end client of the express app reflected in the container our Express.js application.
Step 6: Node_Modules Resides Locally
If you recall, we deleted any node_modules folder that might have existed in your local application root directory before we created the last container. However, if you look again, the node_modules folder will exist. Why is that?
Changes that are required to host a running a node.js application, such as installing all dependency node modules, are reflected locally through the mounted volume we created.
Step 6a: Interacting with the Container
We can verify that by connecting to the running container. We can open a bash shell on the container and examine information about the working directory.
We didn’t start the container in a detached mode, so you either need to stop the running container and restart using the Docker start command as seen in the previous tutorial, or you’ll need to open a new terminal/prompt and connect by:
- docker exec -it express-dev-app /bin/sh
- Issue command at the prompt: ls -l
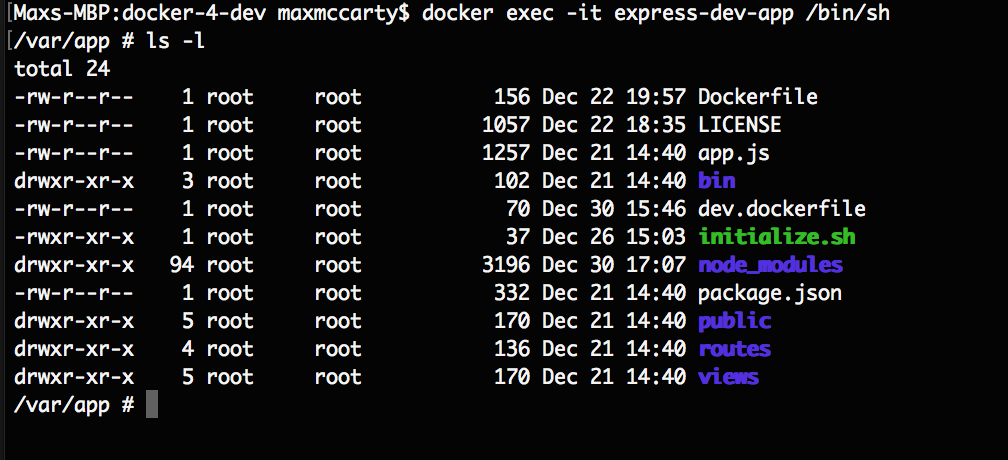
What did we do?
- We connected the running container using the EXEC command by
- providing the interactive terminal using the -it flag
- and specifying we wanted to connect to a bash shell using the /bin/sh parameter.
- You should notice that when we connected to the container we are automatically connected to the working WORKDIR directory.
- We used the list command ls -l to show the directory contents – is actually showing the contents of your local volume mounted host directory.
Conclusion
The gravity of what we accomplished in this Docker for Developer tutorial seems simple, yet it’s extremely powerful. We are modularizing our applications setup to a container that hosts all the application’s necessary setup, while maintaining control over the source code that is running our application in the container.
We’ve only cracked the surface of how and what we can do regarding application development and the use of containerization with Docker. In the next tutorial, we’ll take the training wheels off and get serious by using and running a Universal (isomorphic) MERN (Mongo, Express.js, React.js, Node.js) application with hot module reloading in a container.