- Part 1: Containerize your Application Environment (this post)
- Part 2: Creating a Developer Image
- Part 3: Hot Module Reloading and Code Updates in Containers
- Part 4: Composing Multi-container Networks
- Part 5: Sharing Images with Your Team Using Docker Hub
- Bonus: Debug Docker Containers with WebStorm
As developers, we’re always looking for a shortcut, or an easier way to hit the ground running, right? If you’re a team lead, getting your team on the same page, setup and operating with minimal effort and pain is important. Docker can help.
In the realm of software development, there has always been a growing emphasis on modularization, from general principles such as single-responsibility to more concrete implementations such modularizing javascript functionality into stateless components. Here, I’ll show you how we can use Docker to modularize our development environment for a number of similar benefits, including helping us hit the ground running.
Docker 4 Developers
As you know, to get ramped up on a project, you have a checklist of to-dos:
- Pull the code base from repository
- Install external tools such as database(s), caching store, additional tools and services
- Patch and update said external tools
- Configure databases and services for cross-application communication
- Cross fingers and pray (times may vary)
- Debug (reboot at least 3x)
Imagine if after pulling your application’s code base out of repository, you only had to run a few command lines (possibly as few as one) to get your entire application’s environment ready to go. Sounds cool, right?
That’s exactly what we’re out to accomplish. Instead of an encyclopedic approach to laying out all the features and commands of using Docker, I’ll cover the main features as we go through using Docker to containerize a developer’s environment.
This post is the first in a series on leveraging the power of containerization using Docker to easily build an applications development environment that can be shared and up and running in no time.
Docker Toolbox vs. Docker for X
Docker Toolbox was the original collection of tools available for working with a number of Docker resources and will vary depending on your OS of choice. But since then, they have released new Windows and Mac native applications. So in addition to the Linux, OS X and Windows Docker Toolbox variations, you will also see “Docker for Mac” and “Docker for Windows”.
To understand and decide which tool you should use, I wanted to outline the premise for the new native applications. The original Docker Toolbox would set up a number of tools along with the use of VirtualBox. It would also provision a virtual machine running on the Linux Hypervisor for either Windows or Mac.
VirtualBox, Hyper-V and hyperkit, O’My
The native applications, such as in the case of Docker for Mac, install an actual native OS X application. It also no longer uses VirtualBox but the OS X hypervisor hyperkit. Furthermore, shared interfaces and network is managed much simpler. There are also some user experience updates to the tooling used to work with Docker as well. These same changes are also apparent in the Docker for Windows native application, utilizing the Hyper-V hypervisor instead, along with the host of other similar network and tooling updates.
In the end, the experience is suppose to be a more positive, efficient experience as well as less error-prone. However, you will find a vast majority of external documentation related to the Toolbox – so it could be to your advantage to know about Toolbox.
Getting Started
This initial tutorial will simply use an out-of-the-box express.js application. When we get to live editing of source code and communicating between containers, I’ll move onto a more involved, universal React.js application running Webpack’s dev-server with hot module reloading, a MongoDB database and more.
Step 1: Installation
In an effort to get to the goodies of using Docker and containerizing a developer environment along with a slew of various OS versions, I’ll leave it to you to download whichever Docker version (Toolbox or native) and OS you want to use:
Toolbox: https://www.docker.com/products/docker-toolbox (OS X and Windows)
Docker for Windows: https://www.docker.com/products/docker#/windows
Docker for Mac: https://www.docker.com/products/docker#/mac
Step 2: Source Code / Environment
The next step is to have obtain the source code of the development application you want to containerize.
For now, you can grab this project from Github that I’m using in this part of the tutorial to save a few steps.
Step 3: Creating a Docker Image File
Remember, the primary goal is to run our application in an isolated and modularized environment. In order to have Docker create that environment, we have to tell it how to create it. We do that with a set of instructions using a Docker Image File.
- Using your IDE of choice, add a file and name it “Dockerfile” to the project root:
- Copy in the below file contents
Dockerfile
FROM mhart/alpine-node:6.9.2

WORKDIR /var/app

COPY . /var/app

RUN npm install --production

EXPOSE 3000

ENV NODE_ENV=production

CMD ["node", "bin/www"]
What did we do?
Dockerfile is the default name that Docker looks for in an image file, but it can be any name, which we’ll see in a later step. These instructions inform Docker that we want to create an image:
- FROM a base image mhart/alpine-node with the tag of 6.9.2.
- Setting the working directory WORKDIR that the application will run from
- COPY the contents of the current local directory “.” to the specified location
- Then RUN the command “npm install —production” from the WORKDIR
- We’ll also EXPOSE the port of 3000 from the container when it is created from the image
- In addition, we wanted to create a container local ENV variable of NODE_ENV set to “production”
- Finally, we want to start our express.js server, which resides in the “www” file in the “bin” directory execute the command “node bin/www”
Step 4: Building an Image
Now that we have an Docker image file, which specifies details about how to create an image, let’s stop and talk about what an Image is:
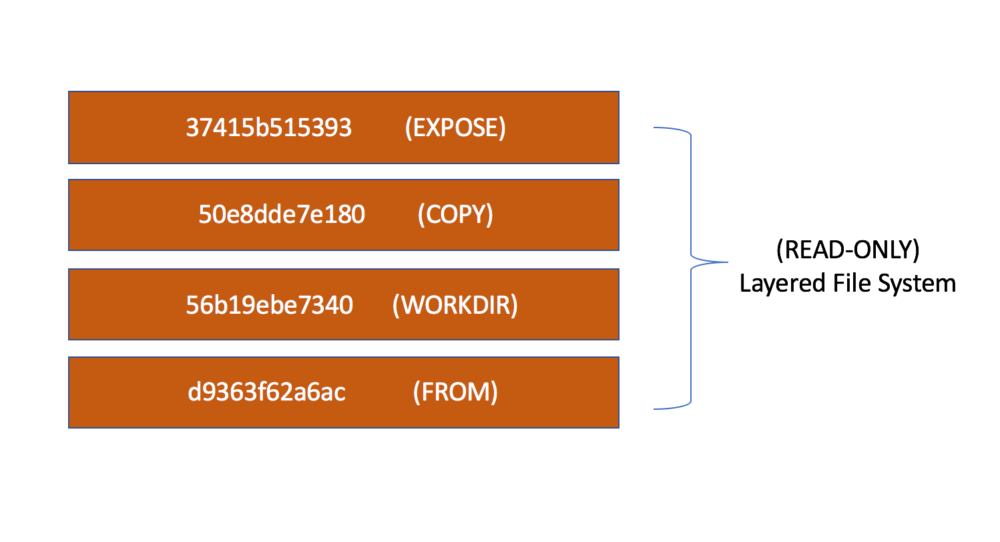
An image is a read-only layered file system. It makes up the base file system of the environment we keep eluding to. The image file we made in the previous step will instruct Docker on how to create each of these layers for the image we are going to create from that Dockerfile now.
But if it is a “read-only” file system, how are we going to write to it, (for instance, performing code changes to our application’s code-base during development)? Good question, I’ll answer that in an upcoming step.
Step 4a: Build Production Image
- From a terminal/prompt navigate to the root of our project directory.
- Run the command (including the period at the end) :
docker build -t express-prod-i .
What did we do?
- We ran the build command to create an image from the Docker image file we create in Step 3.
- Using the tag switch -t we gave the image a name that we can use for referring to it without having to refer to the Docker generated ID (e.g. 50e8dde7e180)
- We specified the path of the image which was the current local directory which was specified with the “.”
Step 4b: Verify Image
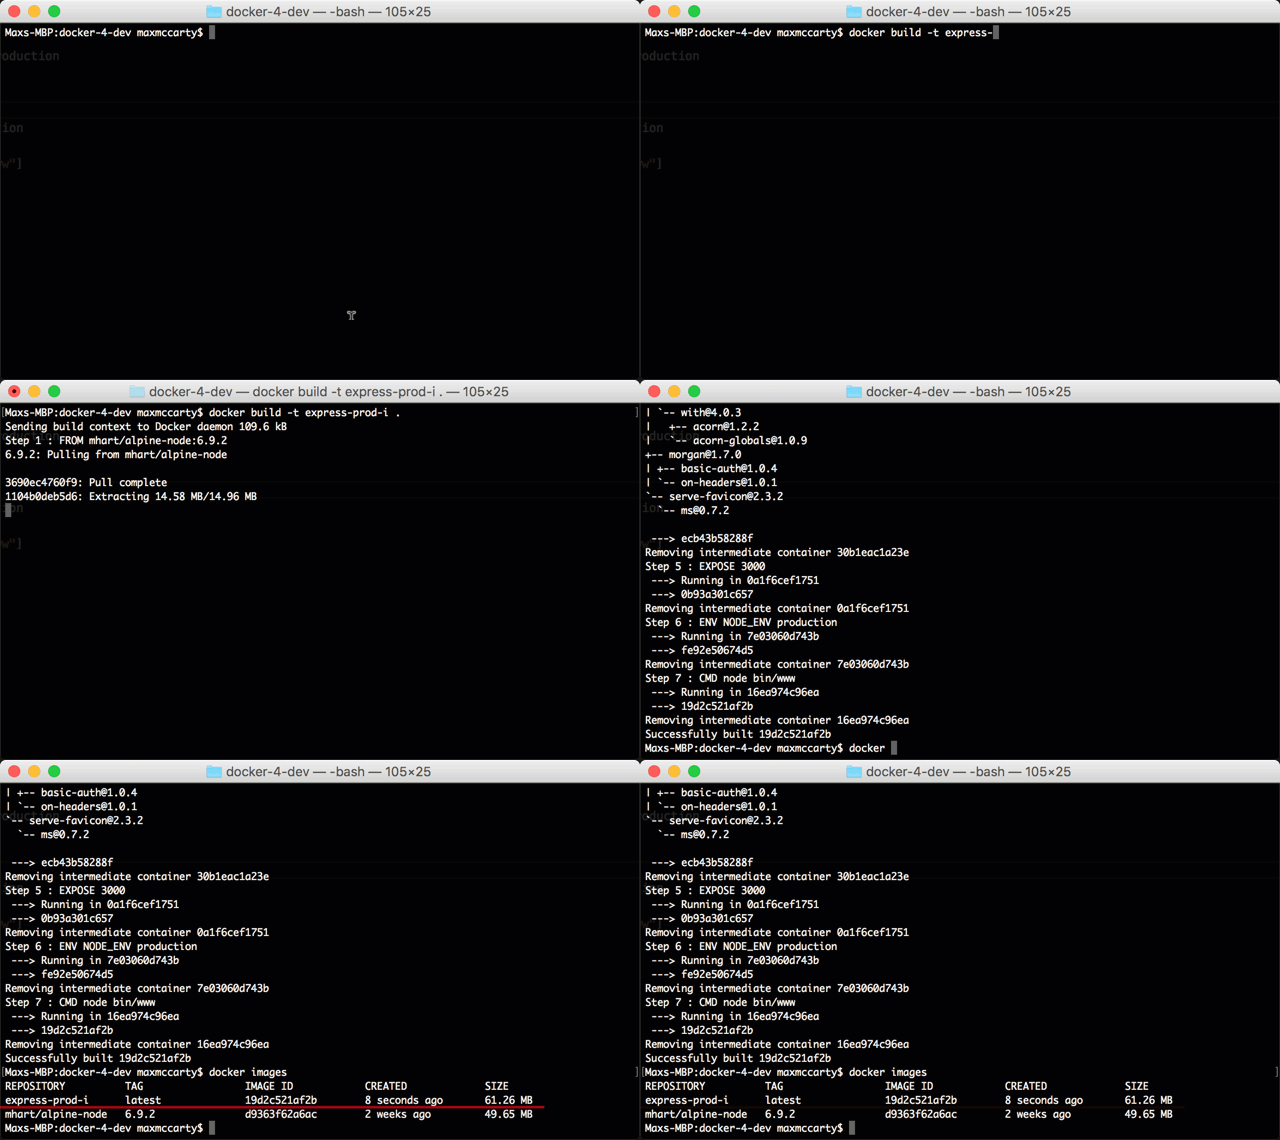
If all went as planned we should see (as in the .gif) a “successful build ….” message. We can now run a command you’ll come to memorize for showing your images:
- docker images
In this case, our combined image is 61.26 MB in size which is a combined of the base alpine-node image and our express application layer.
Step 4c: Review Image File Layers
If we want to see the file layers created for our image we can run the command:
docker history express-prod-i
Step 5: Running an Instance of our Image
Now that we have created an image, we are ready to create an isolated, modularized environment of our application. As I have alluded to a number of times, that environment is a Docker container. A docker container is actually a running instance of an image.
In concept alone, an image and container is very similar to how we would think of a Javascript Prototype or a OOP Class. So, let’s run an instance of the image we created
Step 5a: Generate and Run an Instance of the Image
- Run the command:
docker run -d --name express-prod-app -p 7000:3000 express-prod-i
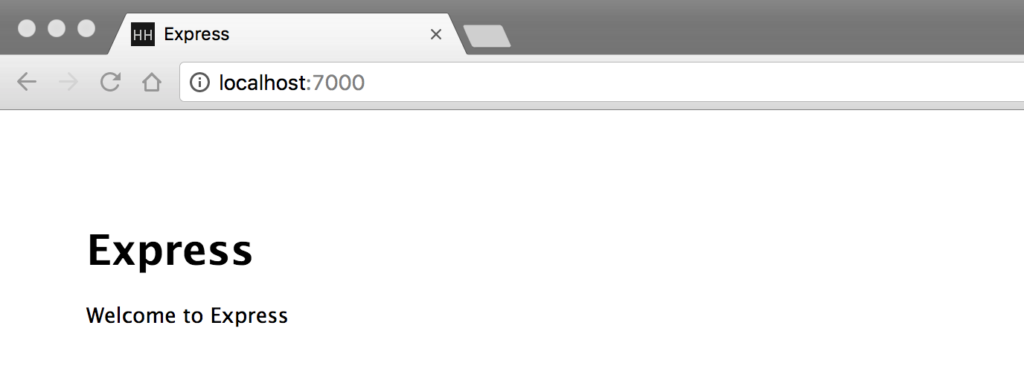
- Launch browser to http://localhost:7000

What did we do?
We created and ran an instance of our express-prod-i image known as a container by:
- Using the RUN command
- Specifying the detached mode -d flag (so we don’t tie up the current terminal/prompt)
- and gave a name of “express-prod-app” to our container using the –name flag
- along with mapping a local port on our host machine of 7000 to the internal container port that we exposed of 3000 using the -p flag
- Finally, specifying the “express-prod-i” image we want to generate and run our instance
NOTE: I used a different local port of 7000 to show you that you can map whatever unused port on the host machine to the internal port being exposed in the container.
Epiphany #1
Did you catch that? We didn’t have to install Node.js or NPM locally. We didn’t have to run npm install to prime the application locally, and we didn’t run the application from our host machine. All these things are happening within the host machine, and this is a simple express.js demo site.
Step 5b: Verify Running Containers
- We can see running containers using the command:
docker ps
- This will show us running containers. We can also specify the -a flag to see ALL containers. It can be useful when things go wrong and we want to see if a supposedly running container has exited unexpectedly:
docker ps -a
Step 6: Stopping and Starting Containers
Stopping a running container is easy as running the…you guessed it:
docker stop express-prod-app
And starting:
docker start express-prod-app
Step 7: Deleting Images and Containers
As we go through these tutorials, it could come in hand to drop an image or container and start over. Below are the steps to do so. In addition, further down under the Bonus section, there are a few helpful shortcuts:
Step 7a: Deleting Containers
To delete a container, we use the remove container “rm” command:
docker rm express-prod-app
To get the container back, we can use the command we issued before:
docker run -d --name express-prod-app -p 7000:3000 express-prod-i
Step 7b: Deleting Images
To delete an image, we will use the remove image “rmi” command:
docker rmi express-prod-i
To get the image back, we can use the command we issued before:
docker build -t express-prod-i .
BONUS
In addition to the steps to delete images and containers, you can also utilize a few helpful shortcuts that have come in handy for me.
Windows Users: In order for the following commands to be recognized, you’ll need to execute them in Powershell.
Delete All Containers
To delete all the containers, run the following remove “rm” command, but execute the command to return all of the containers within that command:
docker rm $(docker ps -a -q)
Windows Users: You will need a bash shell to run the following commands. Mainly because of the GNU make variable references $( ) we use. You can install something like “Bash on Ubuntu on Windows” or even GIT bash. Just remember that a you will need to link up your terminal by running docker-machine env and running the eval command that is listed at the end.
What did we do?
- We issued the container remove command “rm”
- But instead of providing the tag or container ID we provided a list of the containers ID by
- Providing the ALL (-a) flag along with the QUIET (-q) which only returns numeric container ID’s.
Delete All Images
To delete all the images we can do something similar and use the remove images command “rmi”.
docker rmi $(docker images -q)
What did we do?
- Here we used the remove image command but instead gave it a list of docker image ID’s
- by using the list docker images command
- and specifying the QUIET (-q) flag which only returns numeric Docker ID’s.
Docker Cleanup
In addition to these specific commands, a more recent command (credit to herrphon) is the prune command that will remove
- Stopped containers
- Images without any containers
- all orphaned volumes
- Run the command:docker system prune
Production? I Thought We Were Building a Container for Application Development?
It doesn’t take a genius to notice that the image we just created we were notifying Express.js and Node.js that we want to run in production. So what’s the deal?
Remember how we need to have a base image for any image? And who wants to have to ‘rebuild’ an image every time we make a change in development to our application? So we are going to use our production image as a base image for our development image and isolate the development changes to the layered image specified for development.
Conclusion
So, I’ve already dropped a bunch of knowledge about docker. Creating an image file, building an image and generating a running container of that image. But we have a lot to go.
So in the next Docker for Developers post in this series, I’ll tackle creating an image that will be our development version or our application, but based off our production image. We’ll also look at how we can leverage scripts in our container to help set up the local environment for making changes to our source code.
Docker for Devs: Containerizing Your Application has also been published at Summa.com.


